
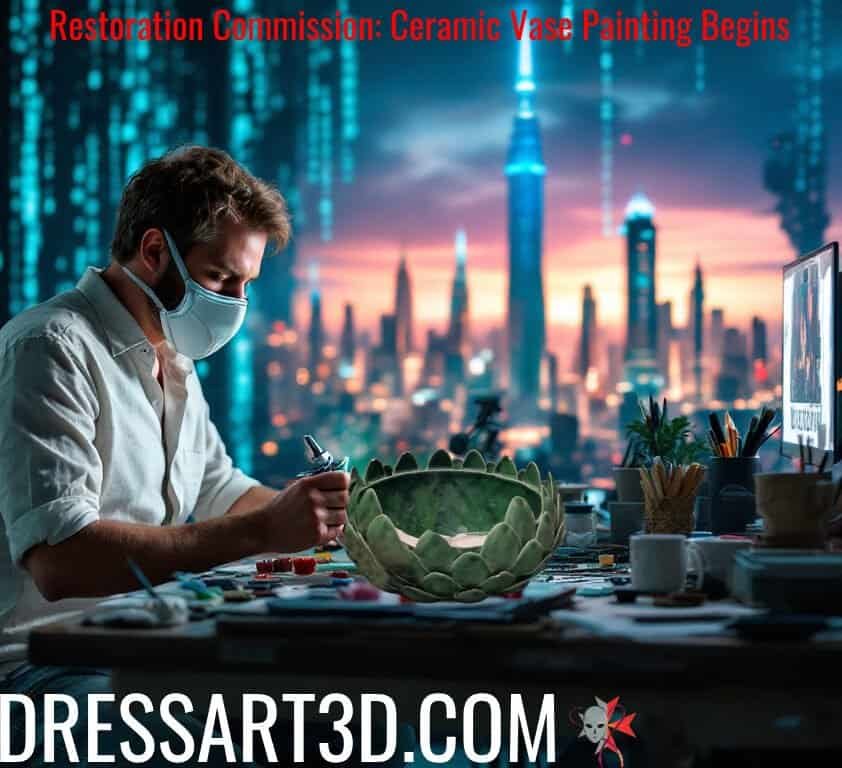


Restoration Commission: Ceramic Vase Painting Begins After a Nail-Biting Repair
From Sanding to Airbrushing – A Delicate Transformation Begins
After weeks of detailed prep work and sculpting, this week marked a major milestone in the restoration commission of the antique green ceramic vase from Villa Bronja. It was finally time to begin the painting phase—a stage I’ve been both excited and nervous about from the start.
If you’re just joining in, this restoration started with reconstructing broken petals using air-drying clay over carefully pinned supports. Now, with all sculpting dried and sanded to perfection, it was time to bring color back into play.
Masking the Vase – Precision First, Paint Later
Protecting What Wasn’t Broken
Before any paint could touch the surface, I had to meticulously masked off the undamaged parts of the vase. This wasn’t just taping off a few spots—each delicate petal required its own careful isolation.
I spent over two hours masking each individual petal that wouldn’t be painted. Even the smallest chipped petals got their own protective layer. Once that was done, I wrapped the rest of the vase in plastic sheeting and sealed it to the tape. Why all this effort? Because most of the painting would be done with an airbrush, and I couldn’t risk paint overspray ruining the original finish.

Restoration-Commission-Ceramic-Green-Vase-Masking -@-dressart3d.com
Color Mixing – Finding That Elusive Antique Green
The Secret to a Convincing Match? Patience and Layers
Mixing paint for a restoration commission is nothing like painting new miniatures. The goal isn’t just to make something look good—it has to blend perfectly with an aged, weathered finish.
I began with a standard green base and slowly built my shade by adding a few drops of black and layering in lighter and darker greens. After multiple test swatches, I landed on a mix that looked very close. But here’s the catch: this vase’s original paint wasn’t a solid color.
The antique finish was achieved using a watery technique—the original green had a translucent, washed effect, subtly blending with the ceramic’s natural white glaze. There was no way I could perfectly recreate that exact tone—but I could come close with the right technique.
Airbrushing Begins – And Then, Disaster Strikes
The First Coat: Ceramic White Underlayer
Before applying the green, I airbrushed all sculpted and chipped petals with a ceramic white base. This step helped cover seams and create a clean surface for blending my mixed green tones.

Restoration-Commission-Ceramic-Green-Vase-Priming -@-dressart3d.com
Slowly Building Color With Controlled Layers
With my paint ready and the vase masked, I started applying thin layers of green with my airbrush, using a hairdryer between layers to speed up drying time and prevent drips.
Everything was going smoothly—until it wasn’t.
The Meltdown (Literally)
In a moment of total oversight, I left the hot metal end of my hairdryer too close to the airbrush’s rubber hose. The heat melted a hole right through it. No air pressure, no airbrush. No progress.
Now, I live on an island with no specialty art supply stores—ordering a replacement hose would take a minimum of 15 days. That kind of delay just wasn’t acceptable.
Creative Repair – Superglue and Medical Tape Save the Day
Panic set in, but I’ve learned over the years that stepping away helps. I took a calming bike ride and returned to my workshop with a plan inspired by an old trick my electrician teacher taught me: medical tape and liquid superglue.
I wrapped the hose with tape, sealed it with super glue, let it dry thoroughly—and it worked! The hose was airtight again, and I was back in business.
Painting Success – A Smooth and Natural Blend
I resumed my airbrush work, layering paint carefully until I was happy with the result. I used heavily thinned paint to recreate that blended green-on-white look.
After a few hours of focused painting, I stepped back to inspect the results. I have to say—I was truly happy with how it turned out. The sculpted petals blended in beautifully, and even the chipped spots were no longer noticeable.

Restoration-Commission-Ceramic-Green-Vase-Blending -@-dressart3d.com
Sealing the Paint – Matte First, Glossy Last
The Importance of Protection
To protect the delicate paintwork, I waited a couple of days before sealing the piece. I began with a matte clear spray to lock everything in place without adding shine.
Then, for that final baked ceramic look, I applied a glossy varnish by hand. The finish gave the painted areas the same sheen as the original vase, completing the transformation.
What’s Next in This Restoration Commission?
The Final Reveal Is Coming Soon!
We’re almost there! The restoration is nearly complete. In the next post, I’ll share the final reveal of this beautifully restored green ceramic vase.
This restoration commission has been a huge learning experience—full of unexpected problems, creative solutions, and a deep appreciation for preserving old-world craftsmanship.
Help Support More Projects Like This at DressArt3D
If you’ve enjoyed following this restoration, you can help us bring more projects to life! Visit dressart3D.com – Unique 3dPrinted Painted Miniatures & merch to explore:
✅ Hand-painted 3D printed miniatures
✅ Exclusive fantasy/sci-fi t-shirts and mugs
✅ Custom miniature commissions
✅ Behind-the-scenes blog articles like this one
Every purchase directly supports our creative work and lets us take on more restoration commissions just like this.
Got a question or a piece you’d like restored?
📩 Email me at contact@dressart3d.com
Final Thoughts – From Crisis to Completion
This week was a rollercoaster—but one with a happy ending. From carefully masking and mixing color to disaster recovery with a DIY hose fix, this restoration commission kept me on my toes. And I wouldn’t have it any other way.
Thanks for reading—stay tuned for the final reveal!
———————————————————————————————–
Thanks with a Gift!
Thanks for sticking with this long read. If you managed to arrive to this point I sincerely think that you found this reading an interesting one and I really appreciate it. As a small token for your interest, may I remind you that if you simply create an account with our online show you will be instantly given a one time, no expiry 10% Discount Coupon. You will be able to find it in the coupon section of the My Account Section in the links section above.
Thanks for appreciating our Art!


Love how honest you are about the challenges. So relatable!
I like the efforts you have in the vase, regards for all the great content.
I’m often to blogging and i really appreciate your content. The article has actually peaks my interest. I’m going to bookmark your web site and maintain checking for brand spanking new information.
Excellent result! Ever considered using epoxy clay instead of air-dry?
Yse but if you know what you are doing air dry clay is much easier to work with when sanding.
You should make a YouTube walkthrough of this—pure restoration gold!
“Wow, what a journey! I’ve been following this restoration commission since the first post, and seeing the level of effort you put into the repainting phase is mind-blowing. The hose incident really hit close to home—I’ve had similar disasters during miniature work, and it’s those unexpected moments that really test our creative problem-solving. Your solution with the medical tape and super glue was not only clever but also practical. I learned so much from the way you approached color matching too. I never thought of combining airbrushing with brush-applied glazes for added realism, but now I want to try that in my next diorama. Can’t wait for the final reveal!”
I truly appreciate your technique of writing a blog. I added it to my bookmark site list and will
Nice post. I learn something totally new and challenging on your website