Restoration Commission: Final Reveal of the Ceramic Nativity Icon
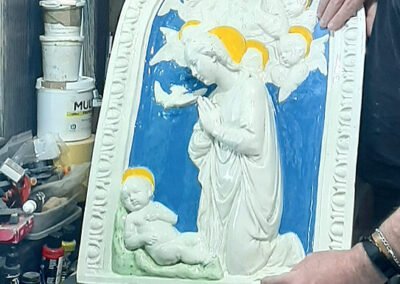
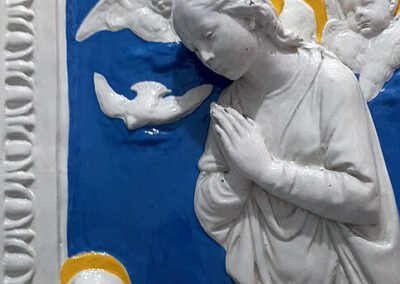
Restoring a ceramic Nativity icon is no easy task, but after 46 hours of detailed work, I can finally unveil the finished piece! This Restoration Commission has been an intense journey, from consolidating the cracks present on the icon, reconstructing the broken frame to carefully color-matching and painting every detail by hand. The final step? Sealing and protecting the paintwork to ensure the icon remains vibrant and durable for years to come.
If you love seeing restoration projects like this come to life, consider supporting our work by purchasing an exclusive hand-painted miniature or unique merch at dressart3D.com! Your support helps us continue these exciting projects and share them with the community.
You can take a look at the final portfolio gallery by following this link:
Portfolio – Gallery-Others-Ceramic Nativity Icon Restoration
For a live summary of these 46hrs of work you can also watch the short tutorial I made by or follow the below:
As usual a in details tutorials on all phases of this restoration are found in my blog articles for you to read.
Here you can read the client’s comments after seeing the finished restoration, life:
When I purchased the Icon/plaque, it was in a very sorry state but I could see the beauty that it once had and needed to find someone that could bring that life back to it. A friend of mine suggested that Joseph could help in fixing the plaque. Joseph explained everything that needed to be done to fix it and guided me through the whole process. It was not an easy job for sure but he overachieved and restored it back to the original beauty.
Steve P. Malta
Now, let’s dive into the final stages of the restoration and see how this icon was transformed from damaged to fully restored!
Sealing the Work: The Final Step in the Restoration Commission
Applying the First Matt Clear Coat
Once all the painting was complete, I needed to seal the surface to protect the artwork. I started by applying two layers of matte clear coat using a spray can. This step was essential for:
✔ Locking in the paint and preventing future chipping
✔ Giving the surface a smooth, even finish
✔ Ensuring the colors stayed vibrant over time
After allowing the matte coat to dry for 24 hours, I moved on to the next crucial step—applying a gloss varnish.
Hand-Applying the Gloss Varnish for a Ceramic Finish
Unlike the matte coat, which was sprayed on, the gloss varnish had to be applied by hand. Why? Because I needed to replicate the original glossy finish of baked ceramic, and a spray coat alone wouldn’t have provided the right effect.
Hand-brushing the gloss coat ensured:
✔ An even shine across the entire surface
✔ A true ceramic-like appearance that matched the original icon
✔ Stronger protection against dust, moisture, and aging
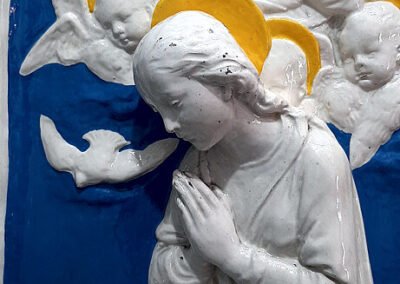
The result? A smooth, flawless finish that made the restored areas completely indistinguishable from the untouched parts.
The Journey: Highlights from the Restoration Commission
Before we reveal the final result, let’s take a look back at some of the biggest challenges and milestones throughout this project.
Consolidating the Icon.
A circular deep crack from side to side was present all around the frame. This had to be fixed and consolidated because the frame was only kept in one piece thanks to its outer frame. To consolidate the piece I used medical cloth tape and super glue to ensure a solid gluing together of the cracked parts.
Rebuilding the Broken Frame
The Nativity icon had a severely damaged frame, requiring me to sculpt, reshape, and sand down new clay parts. This alone took countless hours of fine detailing to ensure that the reconstructed areas blended seamlessly with the original ceramic.
Priming and Spotting Imperfections
Once the frame was rebuilt, I applied a thin white primer. This step helped highlight any imperfections that needed additional sanding before moving on to the actual painting. Even after several rounds of fine-tuning, filling, and smoothing, the real challenge was yet to come—color matching.
Color Matching: The Most Difficult Part
Matching paint colors on aged ceramics is tricky because paint binds and dries differently on ceramic surfaces. The three key colors I had to replicate were:
🎨 Aged Ceramic White
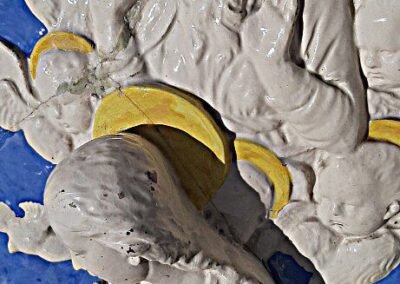
🎨 Golden Yellow Halos
🎨 Deep Blue Background
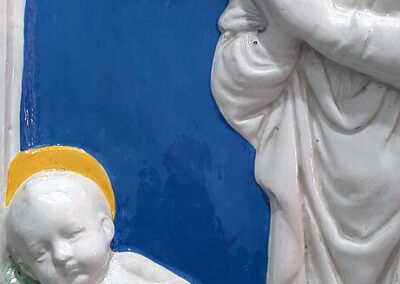
I spent hours mixing Vallejo paints, testing tiny samples, and adjusting ratios until I got a perfect match. The final test? I left one part of the original blue untouched to see if anyone (even the client) could spot the difference!
The Painting Process: Bringing the Icon Back to Life
The painting stage required a mix of airbrushing and hand-painting techniques:
✔ Airbrushed ceramic white to ensure a smooth, blended finish with the untouched parts.
✔ Hand-painted golden halos to match the existing brushwork.
✔ Layered blue paint using different brushes to replicate the aged texture.
Fun fact: I intentionally left a small section of the original blue untouched—can you spot it in the final piece?
The Final Reveal – A Stunning Transformation!
After nearly two full days’ worth of work, the client finally got to see the restored icon in person. His reaction? Pure satisfaction!
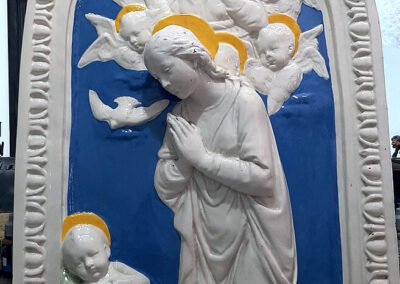
The balance between preserving the aged beauty and restoring its lost details was exactly what he wanted. The smooth, glossy finish blended flawlessly, and the newly painted sections matched the original colors perfectly.
This project proved that even the most damaged pieces can be revived with patience, precision, and the right techniques.
Final Thoughts – Support More Restoration Commissions!
Bringing this ceramic Nativity icon back to life was an incredibly rewarding experience. Seeing a damaged, worn-out piece restored to its former glory reminded me why I love this craft. Every detail mattered, from the sculpting and sanding to the final brushstrokes and varnishing.
You can take a look at the final portfolio gallery by following this link:
Portfolio – Gallery-Others-Ceramic Nativity Icon Restoration
If you enjoyed this journey and want to help support more restoration projects like this, you can:
🔹 Purchase an exclusive, hand-painted miniature or unique merch at dressart3D.com
🔹 Follow us for more behind-the-scenes restoration projects
🔹 Reach out for commissions at 📩 contact@dressart3d.com
Every purchase helps us bring more art back to life and continue sharing these amazing projects with the world.
✨ Thank you for following this journey—stay tuned for more exciting restorations and miniature projects! 🎨
———————————————————————————————–
Thanks with a Gift!
Thanks for sticking with this long read. If you managed to arrive to this point I sincerely think that you found this reading an interesting one and I really appreciate it. As a small token for your interest, may I remind you that if you simply create an account with our online show you will be instantly given a one time, no expiry 10% Discount Coupon. You will be able to find it in the coupon section of the My Account Section in the links section above.
Thanks for appreciating our Art!









I never thought ceramic could look this flawless again. Amazing work!
thanks
How did you get that color match so perfect? I struggle with that on minis.
Its a mix of patience experience and sometimes instincts for me.
That final varnish really gave it that glossy antique finish. Brilliant.
You’ve got some serious restoration skills. Respect from a fellow modeler.
The patience and precision here are next level. Truly inspiring.
I love seeing how this came together step-by-step. Waiting for the next project!
The blending work was subtle and professional. Stunning finish!
Thanks to all.
I’m amazed by the restoration, especially the frame rebuild.