Mastering 3D Printing: Challenges in Creating the 3-in-1 Mystical Gateway Portal Model
If you’re a tabletop enthusiast looking for high-quality, unique miniatures, the 3-in-1 Mystical Gateway Portal Model brings a magical touch to your RPG campaigns. In this second part of our series, we’re diving deep into the intricacies of 3D printing for this versatile model. Designed to serve as a gateway, a mystical well, or an earth symbol, this model required a strategic approach to achieve a high-quality, beautifully detailed finish. Here’s how I tackled the 3D printing challenges to bring each part of this complex model to life.
__________________________________________________________
3D Printing Design Strategy for the Mystical Gateway Portal
Every model I design begins with one main question: How will it be printed? With 3D printing offering incredible versatility, it’s crucial to keep the end result in mind from the beginning. Here’s what I kept in mind throughout the design process:
- Choosing the Right Printer for 3d printing
For intricate details, resin printing offers unparalleled precision, whereas FDM printers work best for simpler, larger, or more durable parts. - Selecting the Right Materials for 3d printing
The materials you choose significantly impact durability and visual quality. For detailed sections like the arches, high-quality resin was the only choice. For larger, sturdy sections, PLA filament offers a great balance of strength and ease of printing. - Part Thickness
Durability matters in tabletop models, so parts like connecting roots needed to be thick enough to withstand handling without looking bulky. - Strategic Cutting Points
Breaking the model into smaller parts makes printing, assembling, and painting more manageable and preserves intricate details. - A Solid Base
A stable foundation is crucial for versatile models, especially one like the 3-in-1 Mystical Gateway Portal that offers multiple configurations.
__________________________________________________________
3D Printing the Intricate Gateway Arches: Overcoming Complexity
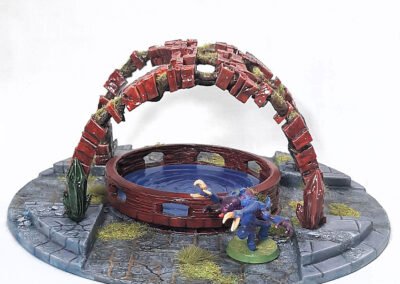
The gateway arches posed the most significant 3D printing challenge due to their detailed brickwork, root connections, and complex structure of interconnected blocks. I had to ensure the print could capture fine details without compromising stability.
Why Resin Printing Was Essential
I initially considered FDM printing for the arches but quickly realized it couldn’t deliver the required level of detail. Here’s why resin was the best choice:
- Ultra-Fine Layer Lines
Resin printing’s thin layers result in nearly invisible lines, reducing post-processing work and maintaining intricate details. - Support Placement Flexibility
Resin supports are more flexible, making it easier to remove supports from delicate areas without damaging the print.
Setting Up Supports for 3d Printing Success
Setting up supports was challenging for such a complex model. Here’s how I approached it:
- Bottom-Side Support Placement
To protect the visible details, I placed supports on the underside of the model, where any marks would be hidden. - Using the Thinnest Supports
Thin supports leave minimal traces, reducing cleanup without sacrificing stability. - Manual Support Adjustments is a must before 3d Printing
While I used Lychee Slicer’s automated support generation, I manually adjusted supports for high-stress points, ensuring the print would succeed. - Thicker Anchor Supports before 3d Printing. Why?
Four thicker supports were added to the ends of the arches to stabilize the model as it printed.

3 in 1 Mystical Gateway Portal Model – Blog Article @ dressart3d.com
Thanks to this carefully planned 3D printing strategy and my Elegoo Saturn 2 8k Resin Printer I managed to achieve a beautiful test print with minimal cleanup. Each intricate detail of the gateway arches was preserved, allowing me to simply repeat the print to successfully to create the second highly detailed gateway without having to do any adjustments.
__________________________________________________________
3D Printing the Well with FDM for Durability
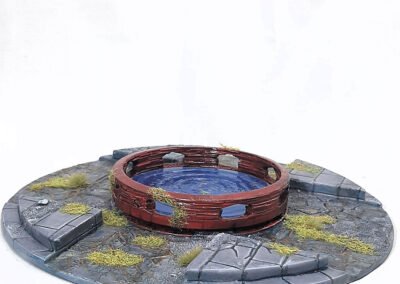
The well was simpler to print due to its cylindrical shape and minimal detailing, making it an ideal candidate for FDM printing.
Why FDM Was Ideal for 3d Printing the Well
This part of the model fit the strengths of FDM printing for two reasons:
- Easy Vertical 3d Printing
The well’s cylindrical shape allowed it to be printed vertically on an FDM printer, requiring fewer supports and reducing cleanup time. - Durability Over Detail
Since the well didn’t require extreme detail, FDM printing was a practical choice that avoided the higher costs and greater hassles associated with of resin printing.
Positioning and Supporting the Well
I placed the well directly on the FDM printer’s bed, reducing the need for supports. The only tricky parts were the five small arches around the well, but with minimal supports, I managed to keep cleanup simple and efficient.

3 in 1 Mystical Gateway Portal Model – Blog Article @ dressart3d.com
__________________________________________________________
3D Printing a Stable Base Using FDM Techniques
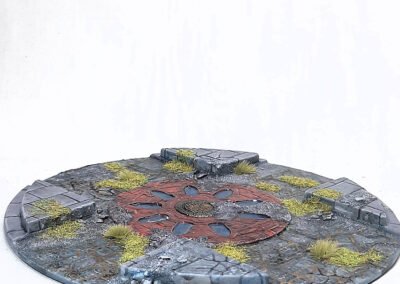
The base was a critical part of the 3-in-1 Mystical Gateway Portal Model, as it supports the structure and maintains stability, no matter the configuration. For this part, I chose FDM printing with a PLA filament for durability and ease.
Why FDM and PLA Were the Right Choices for 3d Printing the Base
An FDM printer using PLA filament was perfect for the base, as it:
- Provided a Flat, Sturdy Foundation
FDM printing enabled a solid, warp-resistant base with high structural integrity, which is crucial for tabletop models. - Reduced Time and Effort in Post-Processing
The base didn’t require any supports, so I was able to achieve a clean print with a natural stone and root texture ready for priming and painting.
__________________________________________________________
Key Takeaways for Successful 3D Printing of Detailed Models
Creating the 3-in-1 Mystical Gateway Portal Model was an intensive project that required careful planning, testing, and the right balance of tools and techniques. Here are my main takeaways:
- Design with 3d Printing in Mind
Planning for the 3D printing process from the start saved me countless hours in adjustments and post-processing. - Choose the Right 3d Printer for Each Part
Resin printing delivers intricate details for high-fidelity pieces, while FDM printing is ideal for simpler or sturdier parts. - Fine-Tune Support Placement
Automated support placement tools are a great starting point, but manual adjustments ensure a successful print with minimal cleanup. - Don’t Skip Test Prints
Test prints are essential for catching potential issues and optimizing the model’s design and support structure.
By combining careful design with thoughtful printing techniques, the 3-in-1 Mystical Gateway Portal Model turned out beautifully. If you’d like to add this unique piece to your tabletop collection, you can order it at DressArt3D.com – but remember, it’s available in limited quantities due to the complexity of production.
Looking Ahead: Painting and Final Touches
With the 3D printing phase complete, stay tuned for Part 3, where I’ll walk you through the painting process, adding vibrant colors and textures to bring this model to life as the centerpiece of any tabletop adventure.
__________________________________________________________
3D Animated Model
The model is also available as a fully animated 3d model. Check the video belwo to see the animated version. Contact me contact@dressart3d.com for details.
—————————————————————————————————————————-
Thanks with a Gift!
Thanks for sticking with this long read. If you managed to arrive to this point I sincerely think that you found this reading an interesting one and I really appreciate it. As a small token for your interest, may I remind you that if you simply create an account with our online show you will be instantly given a one time, no expiry 10% Discount Coupon. You will be able to find it in the coupon section of the My Account Section in the links section above.
Thanks for appreciating our Art!











This writeup very compelled me to take a look at and check you work flow which I found interesting to say the least. Thanks quite nice post
“Standing ovation. Your GOOD explanations make this a VALUABLE resource. Keep up the amazing work!”