Epic 3D Modelling Project: The Sleepy Hollow, Hessian Horseman Sword – Part 1 – from Inspiration to 3d Creation
If you’re a fan of Tim Burton’s Sleepy Hollow, you probably remember the menacing Hessian Horseman and his unforgettable sword. It’s a weapon that captures a dark, medieval charm, perfectly suited to the mysterious and eerie vibe of the movie. As a lifelong miniature designer and 3D modeler, I couldn’t resist the challenge of recreating this iconic sword—not as a small-scale prop, but as a full 1:1 life-size replica.
In this article, I’ll walk you through the process of planning and 3D modelling this masterpiece. Whether you’re creating your own life-size replicas or looking for tips to up your miniature modelling game, this guide will provide inspiration and practical insights to bring your visions to life. And if you’re not ready to take on such an ambitious project yourself, remember you can always seek help or buy unique creations from DressArt3D.com.
The Inspiration Behind the Hessian Horseman Sword

“Discover the art of 3D modelling as we recreate the iconic Hessian Horseman Sword from Sleepy Hollow. From inspiration to creation, see how dreams take shape!”
Revisiting the Iconic Weapon
The sword wielded by the Headless Horseman in Sleepy Hollow has always been one of my favorite weapon designs. Its medieval roots, intricate details but yet very simplistic design, and aura of menace make it a standout piece. I initially imagined it as part of a miniature project featuring a headless horse……, but the idea quickly evolved into something bigger—a full-scale replica I could display after I had decided that the miniature will yield a sword and the connection with Tim Burton’s Sleep Hollow Headless Horseman was made in my mind.
A Dream Turned into Reality
I’ve always wanted to own a replica of the Hessian sword but due to complicated even display weapons import regulation, this was a faraway dream for me. With the accessibility of 3D modelling and printing technology today, I realized I could finally bring that dream to life. This wasn’t just a modelling project; it was a way to combine my love for design, my passion for medieval weaponry, and my desire to create something unique.
Planning for Successful 3D Modelling
3d-Modelling-the-Sleepy-Hollow-Hessian-Sword-@ dressart3d.com
Why a Plan Matters in 3D Modelling.
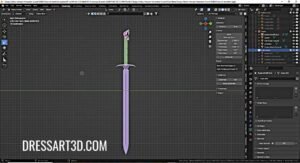
Every successful project starts with a clear plan. When modelling something as intricate and large as the Hessian Horseman Sword, planning becomes even more crucial. Here’s what I kept in mind:
- Manifold Models: Ensuring the model is “watertight” for clean 3D printing. Blender’s 3D Print Toolbox plugin was indispensable for verifying and repairing the model’s manifold status.
- Scaling: Accurate scaling ensures the sword’s proportions match the original. I used reference photos for precision and scaled the model only at the final stage to avoid issues in Blender while ensuring that all the parts are at the accurate real size.
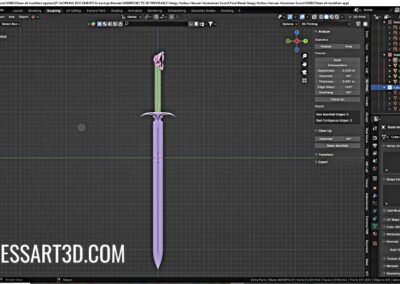
- Part Division: Since my 3D printer can’t handle large pieces, I planned to divide the model into smaller sections—such as the blade, cross guard, handle, and pommel—for easier printing and assembly.
Challenges of Large-Scale Modelling
Large-scale models come with unique challenges:
- Visibility Issues: A true-to-scale sword model can be unwieldy in Blender’s viewport. Modelling it at a smaller scale first was a game-changer.
- Memory Usage: Keeping the model small during creation reduced Blender’s memory load, preventing crashes or lag.
- Printing Constraints: Breaking the blade into four parts and resizing the handle slightly helped ensure everything fit on the print bed without compromising the design.
The 3D Modelling Process
Using Reference Images as a Starting Point
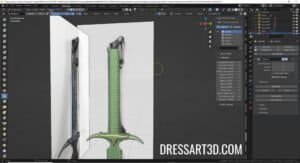
To ensure accuracy, I began with a high-quality, flat reference image of the sword. By importing this image into Blender, I could model directly over it, maintaining correct proportions for each part. All the information I could find on the blade’s actual size was that its blade was 81 cm long. This would come in handy at the end of the modelling process, when I would scale all the model in one go till the blade reaches the 81cm mark. This would ensure that all other parts are to scale.
3d-Modelling-the-Sleepy-Hollow-Hessian-Sword-@ dressart3d.com
3d Modelling the Blade
The blade, with its clean edges and curved tip, was surprisingly straightforward to model.
- I started with a simple cube, scaled it to the approximate dimensions of the blade, and applied a mirror modifier for symmetry.
- Using loop cuts and vertex adjustments, I shaped the blade’s sharp edges and added curvature to the tip.
- For the intricate end curves, I used a sphere 6 time subdivided sphere and the Boolean modifier to cut the desired shape into the blade. The subdivided sphere was used instead of a regular cylinder because the Boolean results in a much more curved shape than a cylinder.
3d Modelling the Handle
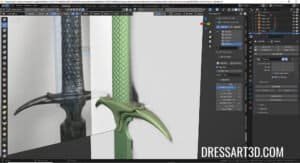
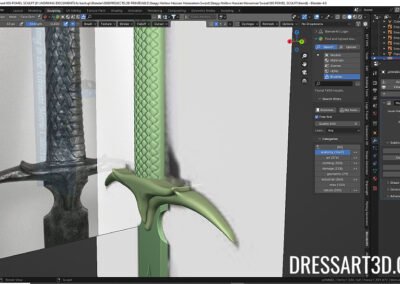
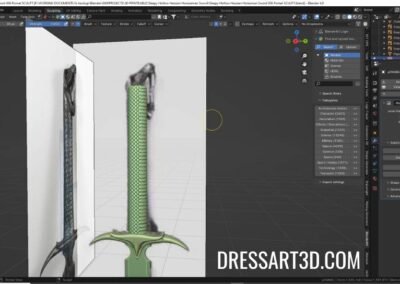
The handle posed a different challenge with its snake-scale texture.
3d-Modelling-the-Sleepy-Hollow-Hessian-Sword-@ dressart3d.com
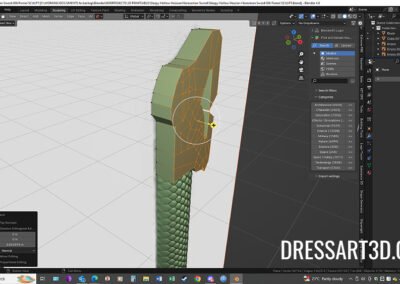
- Starting from a cylindrical primitive, I added a multi-resolution modifier to enable sculpting at high detail.
- Using an alpha brush for the scale pattern, with a linear stroke methos, I achieved a uniform design along the cylinder.
- The strength of the brush was kept high to ensure a well imprinted design which would be clearly printed during 3d printing. This must be kept in mind if you are to 3d print your model.
- The most intricate parts—the top and bottom sections of the handle—required manual sculpting to seamlessly blend the scales into the overall design.
3d Modelling the Cross Guard
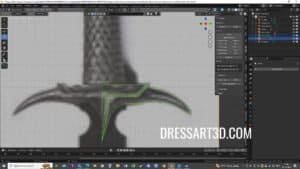
The cross guard’s flowing curves demanded a different approach.
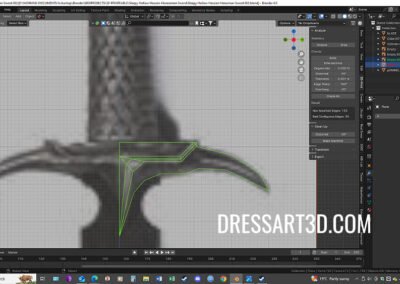
- I employed the “single-vertex method,” extruding a single vertices along the shape’s outline.
- After filling in the faces and extruding them to create thickness, I used a multi-resolution modifier to sculpt the fine details.
- Symmetry was crucial, ensuring the design matched perfectly on both sides.
3d-Modelling-the-Sleepy-Hollow-Hessian-Sword-@ dressart3d.com
3d modelling the Snake Head Pommel
The snake head pommel was the most time-consuming piece.
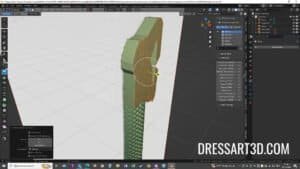
- Using the same single-vertex method, I crafted a base mesh to match the reference image.
- Symmetry sculpting tools helped maintain balance, while frequent checks against the reference ensured accuracy.
- A test print revealed areas for improvement, leading to a refined final design.
3d-Modelling-the-Sleepy-Hollow-Hessian-Sword-@ dressart3d.com
Key Tips for 3d modelling, for Aspiring 3D Modelers
Master the Basics First
Don’t rush into complex projects. Start with simpler shapes and gradually build your skills. A strong foundation in basic modelling techniques will make advanced projects less daunting.
Use Reference Images and Symmetry
Always work with high-quality references and use symmetry tools where applicable. These can save time and ensure proportional accuracy.
Plan for Printing During 3d Modelling
Keep printing limitations in mind from the start. Design your model with proper cuts and assembly points, and test print sections to catch issues early.
Not Ready to 3d Modelling It Yourself?
Creating a life-size replica like the Hessian Horseman Sword is a rewarding but time-intensive process. If you’re not ready to take on such a project, consider exploring DressArt3D.com for unique, professionally painted miniatures and props. Whether for gaming or display, you’re sure to find something that suits your style.
Conclusion and What’s Next
Recreating the Hessian Horseman Sword from Sleepy Hollow has been an incredible journey so far. From finding inspiration to mastering the 3D modelling process, this project has tested and expanded my skills.
In the next instalment, we’ll dive into the preparations for 3D printing this intricate design. Stay tuned, and don’t hesitate to share your thoughts or questions in the comments below. Whether you’re modelling miniatures or tackling life-size replicas, remember: with patience and creativity, you can bring any vision to life.
3D Model
The model is also available as a 3d model. Contact me contact@dressart3d.com for details.

3d-Modelling-the-Sleepy-Hollow-Hessian-Sword-@ dressart3d.com
———————————————————————————————–
Thanks with a Gift!
Thanks for sticking with this long read. If you managed to arrive to this point I sincerely think that you found this reading an interesting one and I really appreciate it. As a small token for your interest, may I remind you that if you simply create an account with our online show you will be instantly given a one time, no expiry 10% Discount Coupon. You will be able to find it in the coupon section of the My Account Section in the links section above.
Thanks for appreciating our Art!











WoW!!!!! Always been a great fan of this sword and due to postage restrictions in my country I could never even order a replica. Maybe this time. Can I order one? I am even one who sent you its name through your video.
The sword is still in its first test run but if it is successful you can have it. Contact me on contact@dressart3d.com
I’ve done some small-scale projects, but this article motivated me to try something larger. The tip about PLA expansion is good!
This looks amazing! I never thought about saving iterations in design files, but I’ll definitely do it now. Thanks for the tip!
Thanks for the subscribing. I am glad you appreciate and enjoy my work.