Assembling and Priming Models: Perfecting the Sleepy Hollow Hessian Sword
Crafting a life-sized replica of the Hessian Horseman Sword from Tim Burton’s Sleepy Hollow, has been an exciting challenge so far. As someone who’s spent over 35 years painting miniatures and now is finally designing my own, I’m thrilled to share the process of assembling and priming models for this ambitious project. Whether you’re a seasoned hobbyist or just dipping your toes into 3D printing and assembly, this guide is here to hopefully, mostly inspire and inform.

“Discover the art of 3D modelling as we recreate the iconic Hessian Horseman Sword from Sleepy Hollow. From inspiration to creation, see how dreams take shape!”
Planning the Assembling and Priming of Models – The Process
Why even Assembling and Priming Models Need a Flexible Plan
I can’t stress enough how important it is to start with a plan. But here’s the catch—plans should be flexible. Unexpected issues often arise during assembling and priming models, especially with large-scale replicas like this one. For example, I faced several fitting issues during this project, but having a flexible plan made adapting to those challenges easier.
Saving Iterations for Troubleshooting can help even during Assembling and Priming Models
One of my golden rules is to save every iteration of your design files. At each significant milestone, I save the design under a new filename. This habit has saved me countless hours of frustration when mistakes occur. Trust me, nothing is worse than having to start over from scratch.
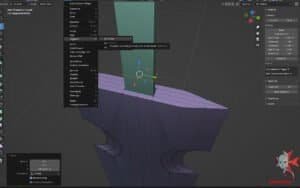
3d-Printing-the-Sleepy-Hollow-Hessian-Sword-@ dressart3d.com
Preparing 3D Printed Parts for Assembly and Priming
Tackling Layer Lines and Stringing
If you’ve worked with FDM 3D printing, you know the struggle of filament lines and stringing. These imperfections can ruin the finish of your model if not addressed. Here’s how I approached each part of the sword:
The Snake Head Pommel
The pommel had moderate stringing and visible filament lines. My process included:
- Step 1: Cut away excess stringing with a sharp blade and sand the remaining bits. Where I could I also sanded as much as possible the layer lines.
- Step 2: Use a blow lamp to quickly melt fine stringing.
Pro Tip: Practice on scrap prints first! Passing a flame over PLA must be done quickly to avoid warping the model. - Step 3: Apply two thin layers of PVA glue to cover the remaining imperfections.
- Step 4: Once done the part was ready for priming but do not forget to mask out the connection parts.
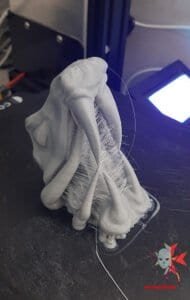
Stringing Caussed by humidity. 3d-Printing-the-Sleepy-Hollow-Hessian-Sword-@ dressart3d.com
I use the method above mainly when the part I am working on is quite organic in nature (having lots of curves) and has areas (behind the fangs) that cannot be reached easily for sanding.
Pro Tip: Be sure that you do not need any more sanding on you part before applying PVA Glue. PVA tends to stay elastic when it dries so it cannot be sanded. If you spot any imperfection after, you will have a hard time correcting it.
Pro Tip: Also try to ensure that you eliminate any air bubbles before letting the PVA glue dry.
The Handle
The handle’s intricate snake-scale organic texture posed unique challenges. Instead of sanding every scale, I applied three coats of diluted PVA glue. This technique smoothed the filament lines while preserving the fine details.
Pro Tip: Designing heavily engraved textures during the 3D modelling phase ensured they remained visible even after applying multiple layers of glue or primer. I had thought on this well before during the designing phase and this is why I stress on the importance of planning especially during the design phase.
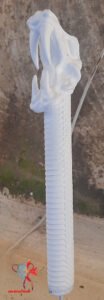
Here you can see the finished pommel and handle undercoated after 2 layers of PVA glue drerssarted.com
The Cross Guard and Blade
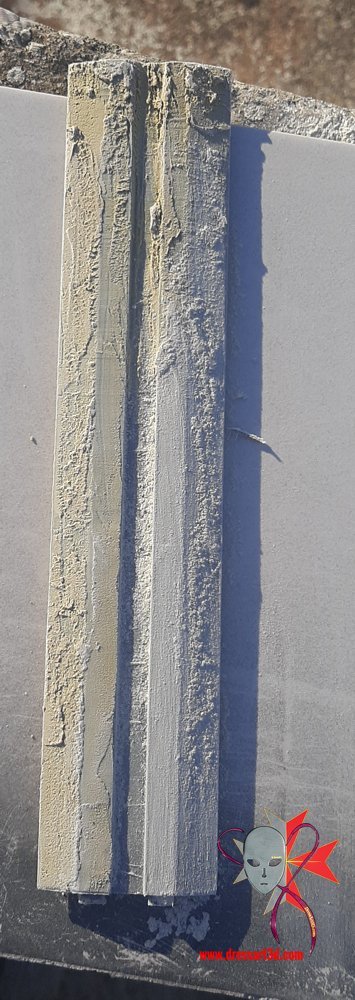
For smoother surfaces like the cross guard and blade, I turned to my trusty car polyester filler putty:
- Apply the putty generously over problem areas.
- Let it dry completely, then sand it to perfection.
- Safety Tip: Always wear a respirator and work outdoors when using polyester filler. The fumes and fine dust can be harmful.
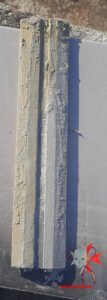
blade section covered in Car polyester putty @ drerssart3d.com
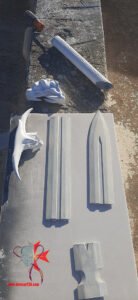
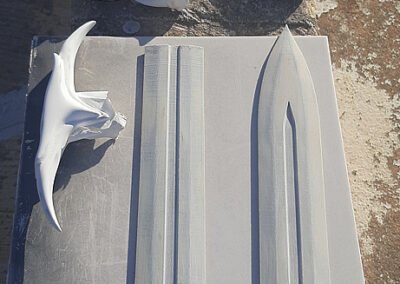
finished parts after sanding car polyester putty @ dressart3d.com
Pre-Assembling the Sword
Dry-Fitting Components
Before committing to glue or epoxy, I always dry-fit the parts to test alignment. For this project:
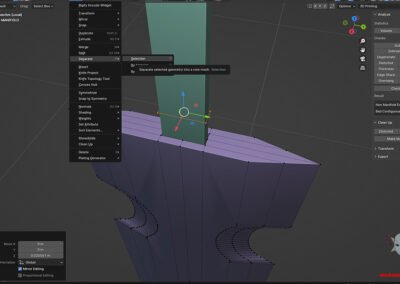
- The Cross Guard and Handle: Blender Boolean-modified male and female joints ensured a snug fit. Minor sanding was needed to perfect the alignment.
- The Blade Segments: Each of the four blade parts had to align seamlessly.
Strengthening Connections with Epoxy
For long-term durability, I used Gorilla Epoxy Glue for the main assembly.
- Apply epoxy generously to the male and female connection points.
- Align the parts carefully on a flat surface to ensure they stay straight.
- Use extra epoxy to fill gaps, which can be sanded smooth once cured.
Pro Tip: Use pencil lines as guides to maintain straight edges during assembly.
Mastering the Art of Seamless Assembly
Joining the Blade into One Flawless Piece
The blade required extra attention. Joining four separate parts to create a single, seamless blade was the most challenging aspect.
- Assemble in pairs: Join the top two parts and bottom two parts first.
- Sand and smooth the connection points before joining the full blade. This will avoid useless stress on the centre connection when working on sanding the other parts.
- Tip for Alignment: Use a flat tile or a long piece of flat wood as I did as your working surface to prevent warping or miss alignment of the flat surfaces.
PRO IMP: Health Tip: Epoxy resin is a strong adhesive but comes with safety concerns. Wear gloves, a respirator, and work in a well-ventilated space. Wash your hands thoroughly after handling any chemicals.

final joined blade. Notice the sanded out outer connections and the still to be sanded central connection @ dressart3d.com
Priming the Assembled Sword
Why Priming Is a Game-Changer
Priming is essential for achieving a professional finish. It not only enhances paint adhesion but also reveals surface imperfections that need fixing.
- Primer Choice: I used white primer for its ability to highlight flaws.
- Application Tips: Apply thin, even coats to avoid obscuring details.
Identifying and Fixing Imperfections
After the first primer coat, inspect the model closely:
- Use fine-grit sandpaper to smooth out any rough spots.
- If needed reapply car fille to fill in imperfection and fine sand when dry.
- Reapply primer to ensure a uniform surface.
Health and Safety Tips for Assembling and Priming Models
- Ventilation Is Key: Always work in a well-ventilated area, especially when using chemicals like epoxy or polyester putty. If needed go outside as I do.
- Wear Protective Gear: Gloves, respirators, and safety glasses are non-negotiable when handling adhesives, paints, or primers.
- Mind the Dust: Sanding generates fine particles. Wet sanding is a safer alternative to minimize airborne dust. This is also another reason to do it outside. You will avoid such harmful dust lingering or spreading to other areas in your house.
- Fire Safety: If using a blow lamp, keep it quick and controlled. Always have a fire extinguisher nearby just in case or again do it outside.
Looking Ahead to Painting
With the sword fully assembled and primed, the next step is bringing it to life with paint. Stay tuned for the next article, where I’ll guide you through the painting process, sharing techniques to make the sword truly stand out.
Bring Your Vision to Life with DressArt3D
If you’re inspired by this project but don’t have the time or tools to create your own, check out our collection at DressArt3D.com. From unique miniatures to fully painted models, we offer one-of-a-kind pieces for tabletop gaming and collectors.
Pro Tip: Grab one of our exclusive t-shirts or merch to support our creative endeavors. Your support helps us bring more projects like this to life!
Let me know your thoughts in the comments or reach out at contact@dressart3d.com—I’d love to hear about your projects or offer tips to help you succeed.
3D Model
The model is also available as a 3d model. Contact me contact@dressart3d.com for details.
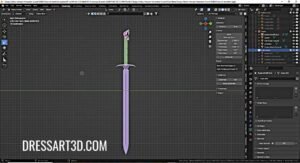
3d-Modelling-the-Sleepy-Hollow-Hessian-Sword-@ dressart3d.com
———————————————————————————————–
Thanks with a Gift!
Thanks for sticking with this long read. If you managed to arrive to this point I sincerely think that you found this reading an interesting one and I really appreciate it. As a small token for your interest, may I remind you that if you simply create an account with our online show you will be instantly given a one time, no expiry 10% Discount Coupon. You will be able to find it in the coupon section of the My Account Section in the links section above.
Thanks for appreciating our Art!












This was informative! I didn’t even know sanding dust could be dangerous. Thanks for the tips on health safety!
I loved this update! Your roof workspace idea is a good suggestion. I’ll try working outdoors for better ventilation. It never crossed my mind on the lingering dust inside my home. THANKS!
Really helpful guide for prepping models. I’m still learning, but your epoxy tips are helping!