3D Printing Made Epic: Crafting the Sleepy Hollow Hessian 1:1 Sword Replica
There’s something magical about taking an iconic weapon from the screen and turning it into a tangible, life-sized replica. For me, the Hessian Horseman’s sword from Tim Burton’s Sleepy Hollow, has always been a dream project. This weapon combines medieval elegance with an eerie, menacing edge, making it an unforgettable piece of cinematic design. With years of experience in 3D printing and miniature design, I decided to take on the challenge of creating this iconic sword as a full 1:1 scale replica.

“Discover the art of 3D modelling as we recreate the iconic Hessian Horseman Sword from Sleepy Hollow. From inspiration to creation, see how dreams take shape!”
In this article, I’ll guide you through the process of 3D printing this masterpiece, sharing insights, tips, and lessons learned along the way. Whether you’re an experienced 3D printing enthusiast or just starting, this journey will offer valuable takeaways for anyone looking to bring their own designs to life. If you’re not ready to take on such an ambitious project yourself, remember you can always seek help or buy unique creations from DressArt3D.com.
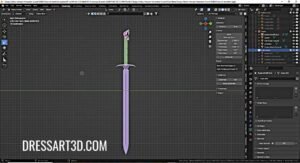
3d-Modelling-the-Sleepy-Hollow-Hessian-Sword-@ dressart3d.com
The Vision: Bringing the Hessian Sword to Life with 3D Printing
Recreating the Hessian Horseman’s sword wasn’t just about the end product—it was about the process of bringing a dream to life. Before diving into the technical details, it’s important to set a clear vision for what you want to achieve.
I envisioned a replica that captured the essence of the original sword: long, elegant, and slightly menacing, with intricate details in the snake head pommel and scaled handle. But I also wanted to make it practical for 3D printing and assembly.
Planning the 3D Printing Process
Why Planning Is Crucial even before 3d Printing.
Every 3D printing project benefits from careful planning, but for large-scale builds, it’s absolutely essential. With the overall sword resulting at around 1 meter in length. I started by breaking the sword into smaller, manageable sections and designing connection points for easy assembly.
The Importance of Saving Iterations
PRO TIP: One of my golden rules is to save iterative versions of your design. Each time I made progress on a particular section, I saved a new file. This habit saved me from redoing hours of work when a mistake crept into the design.
Breaking the Sword into Printable Sections for 3d Printing
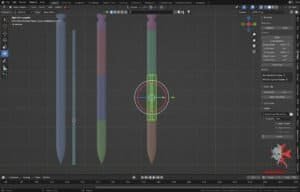
3d-Printing-the-Sleepy-Hollow-Hessian-Sword-@ dressart3d.com
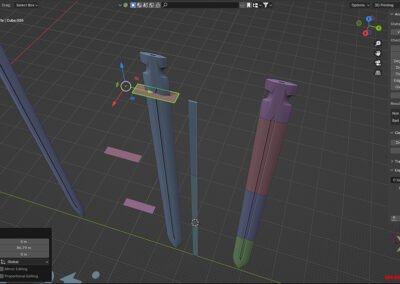
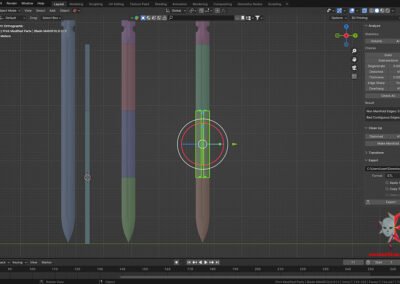
Since my FDM printer has a limited bed size, I divided the sword into five main sections:
- Snake Head Pommel
- Handle
- Cross Guard
- Blade, cut into four separate parts:
- Blade Tip
- Blade Sections 2 & 3
- Blade Base (connects to the cross guard).
Creating Connection Points
To ensure smooth assembly:
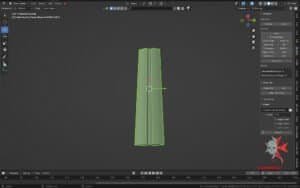
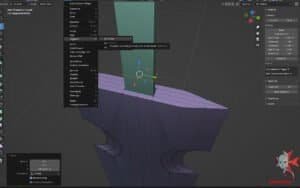
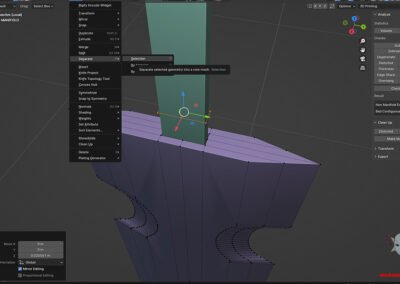
- I used male and female connections, ensuring a snug fit. These were done by placing an appropriately sized cube everywhere I wanted such a connection. This cube was then attached or curved in the parts by using blender’s Boolean modifier.

3d-Printing-the-Sleepy-Hollow-Hessian-Sword-@ dressart3d.com
3d-Printing-the-Sleepy-Hollow-Hessian-Sword-@ dressart3d.com
- PRO TIP: Each carved in connection was slightly enlarged to account for material expansion during printing.
- The goal was to create a seamless, strong blade that looked like a single piece.
3d-Printing-the-Sleepy-Hollow-Hessian-Sword-@ dressart3d.com
Choosing the Right Printer and Materials for 3d Printing
Why I Chose FDM, PLA Filiment Printing
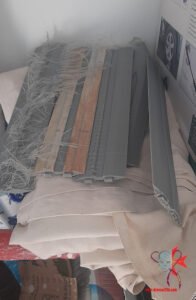
Initially, I considered resin printing for its exceptional detail, especially for intricate sections like the pommel and cross guard. However, resin comes with drawbacks:
- It’s expensive for large-scale models especially if you know that you will need a lot of test parts.
3d-Printing-the-Sleepy-Hollow-Hessian-Sword-@ dressart3d.com
- Standard resin is brittle, making it unsuitable for a long, delicate blade.
Instead, I opted for PLA filament with my trusty Creality Ender 3D Pro. Here’s why:
- Cost-Effective: PLA is affordable, and I knew I’d need a lot of material for test prints.
- Strength: PLA offers enough flexibility and durability for a 1:1 scale prop.
Drawback: PLA is prone to visible layer lines and is sensitive to heat. But with a good plan for post-processing, that I will explain in the next part of this article, I was confident I could overcome these challenges.
3d Printing the Sword: Tips and Challenges
3d Printing Along the Vertical Axis
To maximize the size of each part, I printed them vertically. This approach minimized the need for supports and having a lot of small parts for the blade especially but introduced a new challenge:
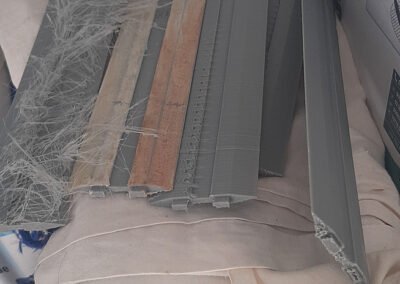
- Layer Lines: Long vertical prints often develop more pronounced layer lines near the top, likely due to slight wobbling.
- Solution: I’ll address this in the next article during the sanding and priming phase.
Avoiding Stringing in Humid Environments
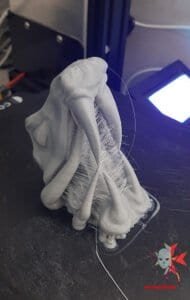
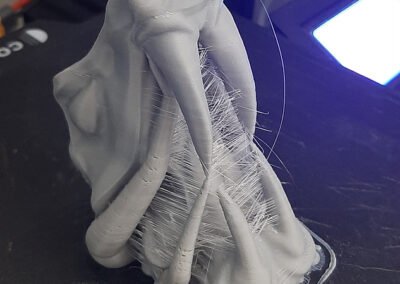
Humidity can wreak havoc on PLA prints, causing stringing between parts. To counter this:
- I printed each part individually.
- I stored my filament in a dry box with silica gel packs between sessions. PRO TIP: Buy a reusable vacuum pump and bags. This will avoid you all humidity PLA filament storage problems. Here you can find a cheap one from Elegoo.com.
3d-Printing-the-Sleepy-Hollow-Hessian-Sword-@ dressart3d.com
Slicing for Successful 3d Printing.
I used Orca Slicer (which is a very potent and free open source slicer) to prepare the models for printing.
- Settings:
- Layer Height: 0.2mm for detailed parts.
- 0.4mm Nozzle for faster and Hassel free 3d printing. Since the parts were to be printed in large format, I could easily address layer line without much trouble in the pre painting phase.
- Print Speed: Was deliberately kept slow and steady to reduce defects.
- Where possible each part was carefully positioned to reduce the need for supports.
PRO TIP: When deciding where to put supports always orient the model to make it possible to place the supports on the less visible part and detail free part of the model. This will avoid you lots of troubles when cleaning and preparing the model for painting.
Lessons Learned from 3D Printing the Hessian Horseman Sword
Overcoming 3d Printing Defects
Some parts, especially the blade sections, needed to be reprinted due to issues with wobbling and inconsistent layer lines. While frustrating, these errors were great learning opportunities.
PRO TIP: Always inspect prints during 3d printing and immediately after completion to catch issues early. If needed do not be afraid to stop the print, re-slice and start 3d printing again.
Preparing for Assembly
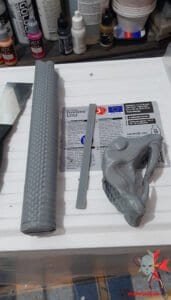
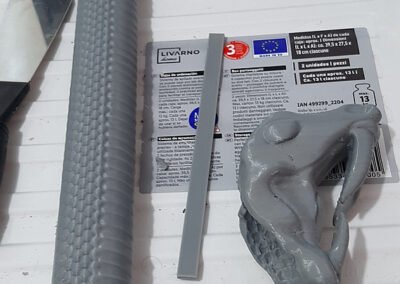
The printed parts were sturdy, but to ensure the final sword looked flawless, I planned extensive post-processing:
- Sanding: To smooth out layer lines, especially on the blade.
- Putty filling: To further smooth the parts.
- Priming: A good primer would help create an even surface for painting.
Key Takeaways for 3D Printing Large-Scale Projects
- Plan Early, Adjust as Needed: Flexibility is key in large-scale projects.
- Save Iterations: Regularly save your progress to avoid losing work.
- Test Prints are Essential: Catch issues before committing to a full print.
- Optimize Orientation: Printing parts vertically maximized the size I could achieve but required careful post-processing.
3d-Printing-the-Sleepy-Hollow-Hessian-Sword-@ dressart3d.com
Looking Ahead: Assembly and Detailing
With the 3D printing phase complete, the next steps involve cleaning, priming, and assembling the sword. I’m excited to see how these printed parts transform into a polished, display-worthy prop.
Stay tuned for the next article, where I’ll walk you through the cleaning and assembly process. And if you’re inspired to start your own project—or prefer to explore professionally crafted miniatures—check out DressArt3D.com.
Whether you’re creating a tabletop miniature or a full-scale prop, remember: with a little patience and creativity, you can turn any idea into reality. If help is needed do not hesitate to contact us at contact@dressart3d.com.
3D Model
The model is also available as a 3d model. Contact me contact@dressart3d.com for details.

3d-Modelling-the-Sleepy-Hollow-Hessian-Sword-@ dressart3d.com
———————————————————————————————–
Thanks with a Gift!
Thanks for sticking with this long read. If you managed to arrive to this point I sincerely think that you found this reading an interesting one and I really appreciate it. As a small token for your interest, may I remind you that if you simply create an account with our online show you will be instantly given a one time, no expiry 10% Discount Coupon. You will be able to find it in the coupon section of the My Account Section in the links section above.
Thanks for appreciating our Art!











I’ve always admired large-scale 3D prints but thought they where out of my reach. This article changed that! The detailed steps, especially on handling imperfections and planning ahead, are exactly what I needed. The honesty about challenges, like wobbling in vertical prints, is refreshing. Amazing work!
Wow! I didn’t realize how much thought goes into a 3D printing project like this. The step-by-step explanation is so helpful for a beginner like me. Thanks
I just started experimenting with my Creality printer, and your tips on breaking models into parts are helpful.
I’ve printed smaller models before, but this article made me realize how much planning goes into a larger project. The section on connection points was great
After years of 3D printing, I still found your approach to planning and alignment refreshing. The pin idea is a well executed touch for blade strength. APPROVED.